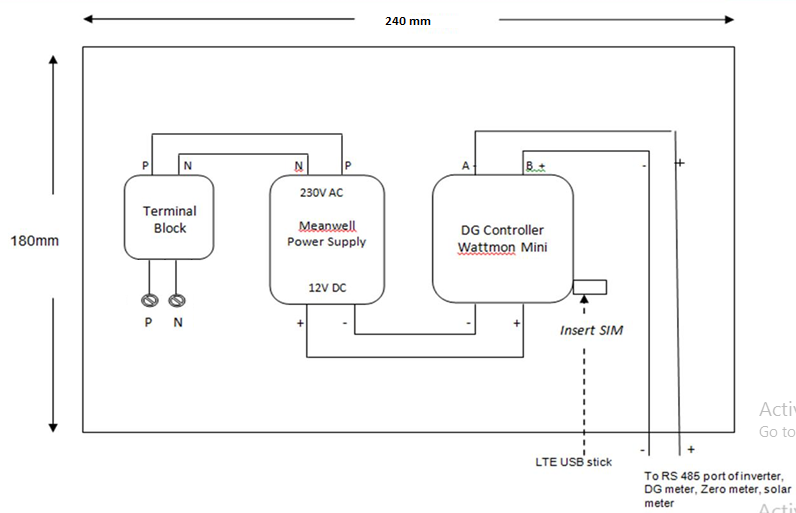
1. Below is the schematic picture of enclosure and power connection points, you have to provide 230V input supply at the terminals as shown below in the controller device.
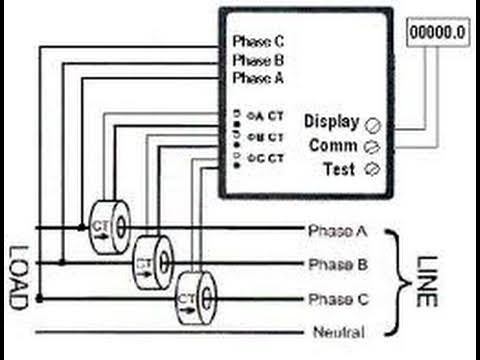
2. In case of Solar DG Synchronization, one LT CT meter, preferably Secure Elite MFM 442 or Schneider 6400 NG has to be installed along with CT at the three phases on the DG set. If there are more than one DG, separate meter has to be installed on each DG set.
3. Once the meter is installed, RS485 cabling from one inverter to another and from last inverter to energy meter and from energy meter to DG Sync controller has to be done.
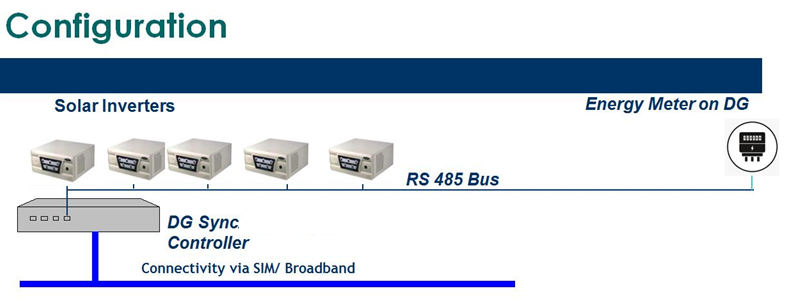
4. Pl set the inverter ID and meter ID as mentioned in the controller panel, along with baud rate of 9600.
5. Once this is done you can connect the ethernet cable( dispatched along with material) from PowerAMR DG Sync device to your laptop and share the anydesk, so that our technical team can check andenable the Logics PowerAMR Platform for Solar DG synchronization.
Do’s and Don’t’s
1) Provide the 230 V power supply to the DG controller device through stable and constant power source, ie through UPS, and voltage regulated constant power source.
2) The auxiliary power source of the energy meter at DG should be given through DG phase and neutral terminals only such that the energy meter at DG remains on only while the DG is in operation.
3) In case meter is installed at LT mains, the auxiliary power supply to the meter at LT mains should be provided such that it remains on only while power supply is available through LT mains.